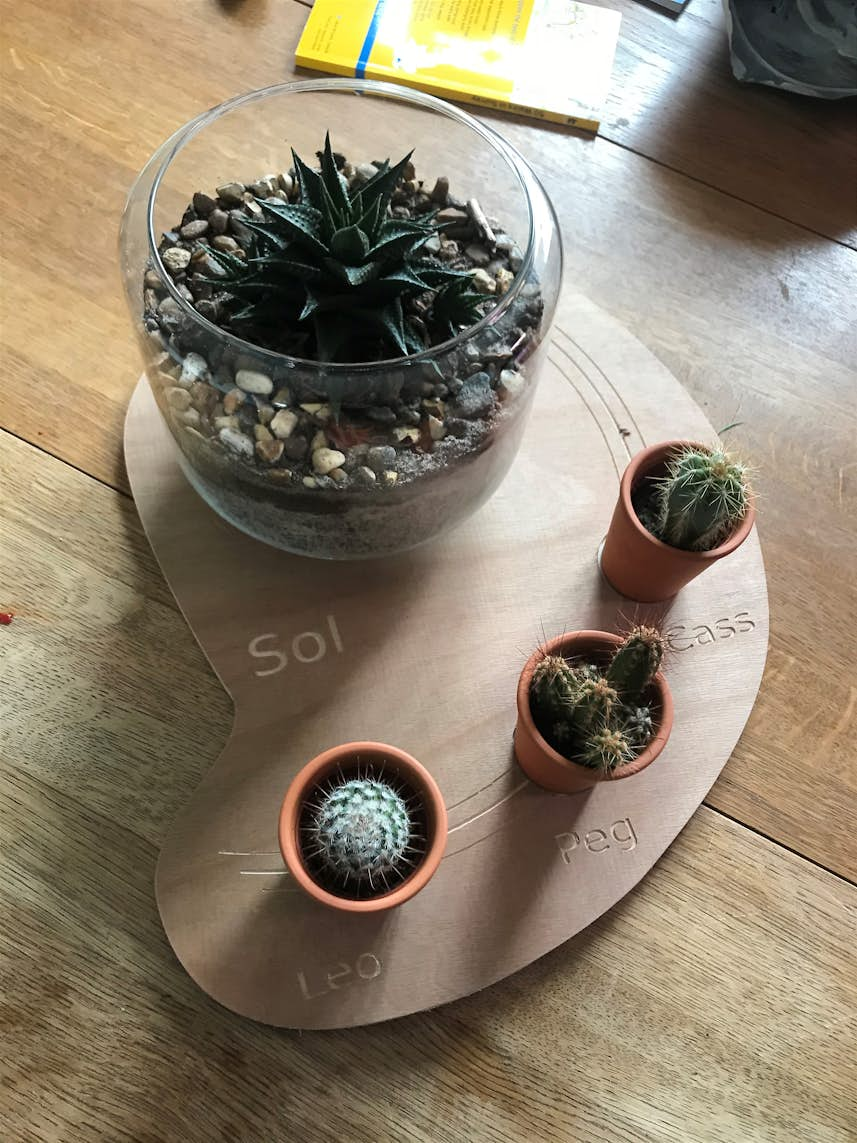
Plant platter


I doubt others can reuse this project, as its rather specific to some plant pots that I wanted to 'house'. However it was my first use of inkscape and also smaller router bits (using the 1/8inch shaft collet).
3
Decor
Files Included (1)
Plants v3.3.svg
144 kB
Materials
380x460mm (ply)
Tools
1/8th inch collet
<1.5mm (1/8 inch shank) straight cutter
Instructions
Excuse the stream of conscious text below. This was my first project utilising the newly acquired shaper and a 2D drawing package, and so was really more about learning how to use 2D packages, and also start to build some experience using the shaper. I'm in the UK, and although I attended one of the courses late last year, I only bought the shaper near the end of the discount offer with the work desk, in March - a good way to spend my (lack-of) travel budget now I'm retired. The 2D package I used was Inkscape (version 0.92.5), running on a windows 10 laptop. The design I came up with was a fluid shape, which morphed into one inspired by the heavens - hence the names I've given to the 4 plants. The largest is in a glass plant holder (with a narrow base) - the others are small open bottomed pots sitting in small clay (solid bottom) holders. Key lessons learnt were: Inkscape is really very powerful. I used its spiral tool to achieved the three virtually concentric curves. The ability to use any font, convert it to vectors, and so cut it with the shaper was easy (although I did look at a few vids first, including one which explains how to use 'union' to merge letters which overlap, although not an issue here. Using the additional 1/8inch shank collet allowed me to use a 1.2mm cutter, for both the lettering and the outer spirals. I used the origin supplied engraving bit for the central spiral, to add a little variety. I did reduce the plunge rate and auto-speed to about half the default when using the 1.2mm cutter (in ply). The ply I used wasn't quite flat (stored it on its edge for too long). This meant that none of the double sided tapes (I'm trying out different makes available in the UK, to see what works best) would adhere. I ended up having to flatted the ply in-situ with clamps as well as tape it down. Not ideal. This side piece of wood (380mm depth front to back) was too deep for the shaper to use the 'fixed' tape I had set up - so I had to add more tape on the item itself. I'm rather paranoid about using tape unnecessarily, so I tried sticking individual sections all over the place. I'm not sure I actually saved any vs doing strips, and indeed ended up cutting through a whole set of them on the left when I cut the spirals. Hum. best laid plans. Anyway, I'm happy with the result. The spiral cuts and letter (2mm deep) showed up the pale lower layer of ply. I had intended to make up a board from some hardwood I have, and cut that, but I think I may stop there and move onto something else. Probably trying out some relatively fine lettering inlay - which fonts work well at what point size.


