PVC Pipe Holder

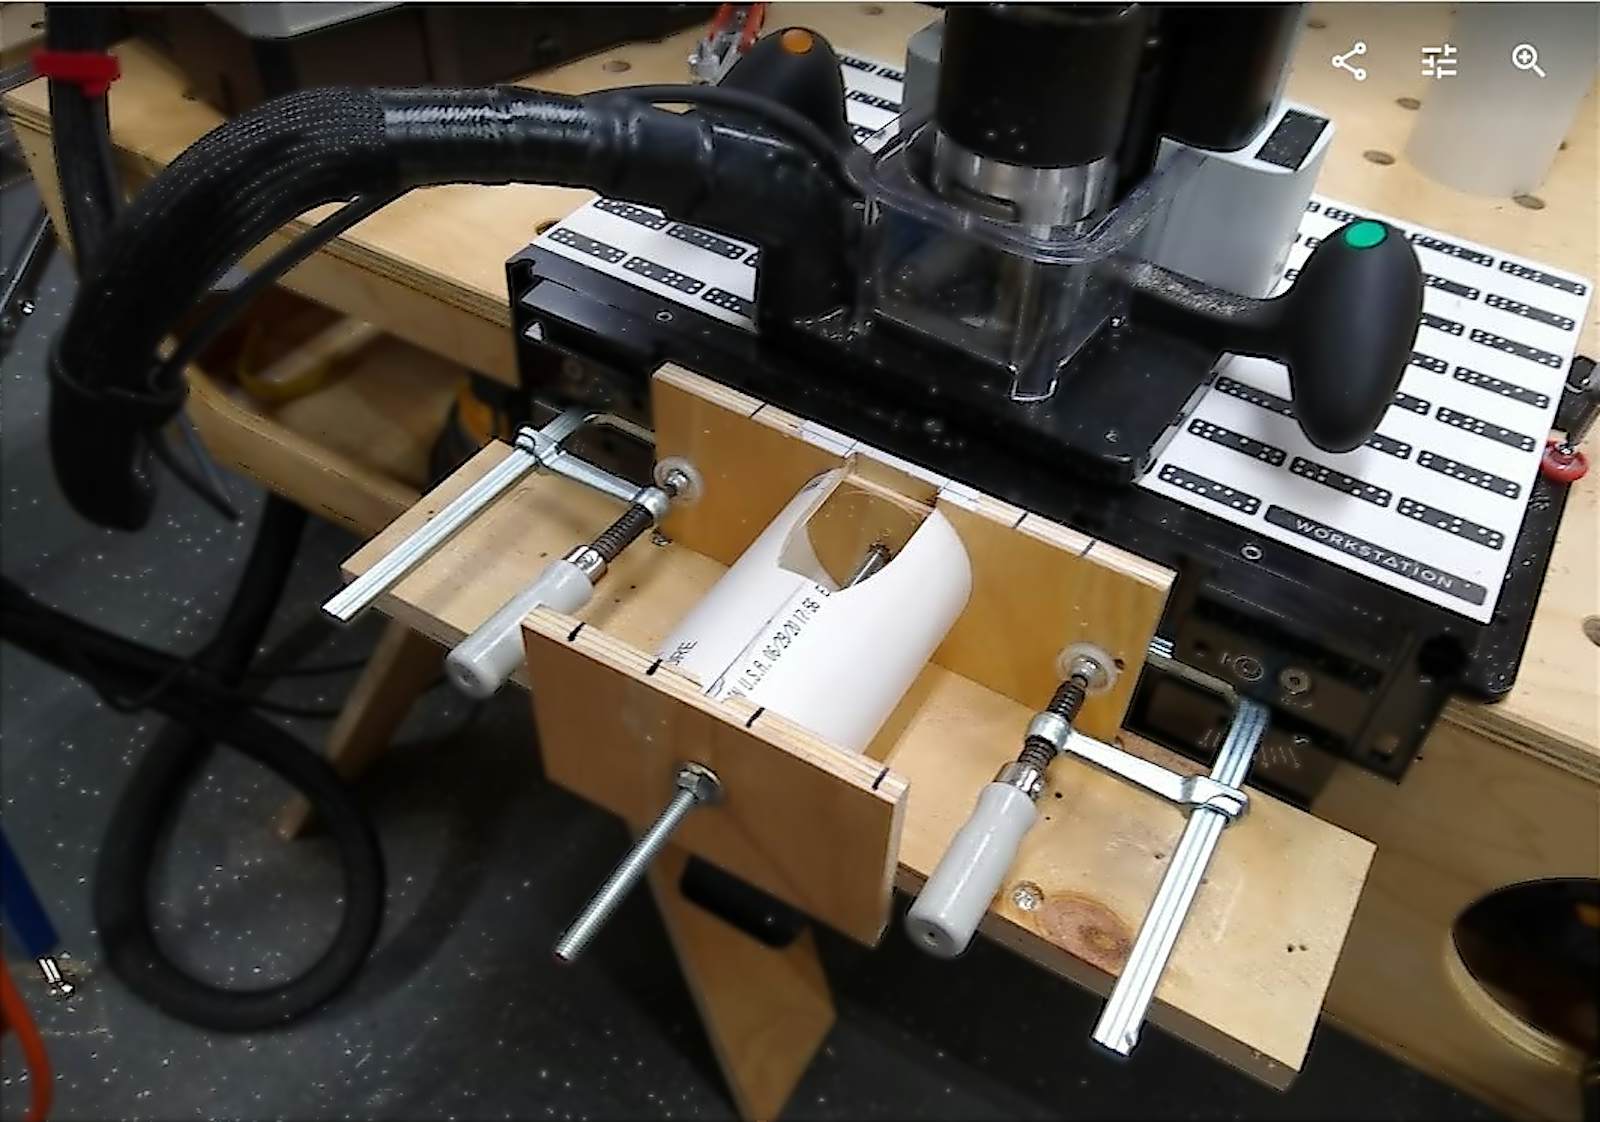


Here is an alternate way to hold the PVC/ABS pipe using a work station for Sam's Drill Rack. Basic SO skills are assumed. When using the jig: Align the left edge of the WS side support with the shelf slot. This will allow you to place jig in the same spot later, load the workspace and keep right on cutting pipes. To change pipes just remove the nut and outboard support. The included .pdf is for onboard create users which I don't really ever use. Please let me know if I missed anything.
15
Cleats
Files Included (2)
pvcSupport4 Drawing v1.pdf
100 kBpvcSupport4.svg
1 kB
Materials
2ea 3 7/8" X 9 1/2" 1/2" plywood
5/16" tee-nut
5/16" threaded rod
5/16" washer
5/16" nut
Tools
Shaper Origin and work station
2 Festool screw clamps for using the jig
1/4" spiral upcut bit.
Instructions
Cut the two pieces of plywood to same length, for now. You shorten the outboard piece last. This will make it easier to create both pieces at the same time using same mounting. Use SO onboard create or a 1" forstner bit to make the 1" tee-nut counter bore on the back of the piece that is closest to the WS. Use SO to create the 1/4" deep cuts for the pipe and through hole for threaded rod. Test fit. Use offsets to make adjustments as required. Pull the tee-nut into place using the threaded rod, washer, nut, and a small piece of 2X4 with a 1" hole in it. Cut 1 3/4" off bot sides of the outboard piece to leave room for clamp handles. Put some white tape on the top of the WS side support with 2 lines to show edges of slot to help with alignment of slot.